Set up webhooks
How to get there: Go to Settings in the sidebar → API & webhooks (opens a separate page).
What are webhooks?
Webhooks, also known as web callbacks or HTTP endpoints, are a way for an application to provide another system with real-time information. The application with the info pushes it out in response to an event. Webhooks can be used in ProductLift applications so that when something happens on the service, ProductLift will send data about that event back to your server.
What is a webhook endpoint?
A webhook endpoint is an HTTP or HTTPS endpoint on your server with a URL. You can provide this to another service that wants to send you data and then receive the payload at that endpoint whenever it changes. Webhook endpoints are often used for sending push notifications, but they have much broader applications, especially when you're working in the API world. If you need to integrate something without using an API, using webhook endpoints could help make everything work together nicely.
Making a webhook in ProductLift
Follow these steps to let ProductLift send webhooks to your endpoint:
-
Go to your portal, and then in the menu go to
Settings > API & webhooks. -
Click
Add webhook -
Enter your webhook endpoint
-
Keep All events selected, or turn it off and select one or more events
-
Keep All boards selected, or turn it off and select one or more boards
-
Click Save webhook
ProductLift can send the data to multiple endpoints (up to 10).
Webhook events in ProductLift
ProductLift sends the following events to your webhook endpoint(s):
-
post.created - user added a new post
-
post.published - post became visible, immediately, from draft, or through scheduling
-
post.deleted - post that is deleted
-
post.status_changed - status change on a post
-
vote.created - user liked a post
-
vote.deleted - user unliked a post
-
comment.created - user added a comment
-
comment.deleted - user removed comment
You can test the output of a webook by adding a webhook tester.
Choosing which events to send
By default a webhook fires on every current and future webhook event. To receive a subset, turn off All events and select at least one event. A custom selection cannot be empty.
Board selection applies to post, comment, and vote activity. Events that do not belong to a board are not blocked by a board filter.
Testing your webhook
Open the webhook's … menu and click Send test to dispatch a synthetic webhook.test payload. Use it to confirm that the endpoint is reachable and parses the request without waiting for a real event.
The test payload uses the same signature scheme as real events, so it is also a quick way to verify your signature-verification code.
Reliability and auto-disable
ProductLift retries each webhook delivery a few times automatically before giving up.
To protect your endpoints (and ours) from forever-broken URLs, a webhook is automatically disabled after 5 consecutive failed deliveries in a row. Common causes are:
- The endpoint has been removed or moved (HTTP 404)
- The receiving server is down or unreachable (connection refused / timeout)
- The URL was a temporary tester (e.g.
webhook.site/...) that has since expired
A disabled webhook shows a red Disabled badge and the most recent failure reason. While disabled, ProductLift stops sending events to that URL. Once the endpoint is fixed, open its … menu and click Re-enable. The failure counter resets on the next successful delivery, so a single hiccup does not cause a disable.
Data structure of the webhooks
Webhooks from ProductLift follow this structure:
-
id - a unique identifier
-
creation_time - the time of the event
-
event - type of event (see webhook events above)
-
data - related data models such as the post, user, and portal
Securing your webhooks (recommended)
Use webhook signatures to verify that ProductLift generated a webhook request and that it didn't come from a server acting like ProductLift.
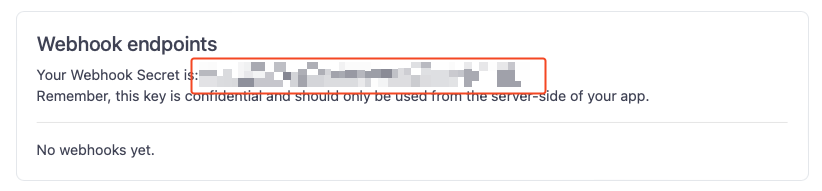
You can reveal your portal's secret below the webhook list in Settings → API & webhooks. This secret is used to sign each webhook request.
How the signature works
- Algorithm: HMAC-SHA256, hex-encoded
- Secret: The global webhook secret from Settings > API & webhooks (same for all endpoints)
- Header: The signature is sent in the
Signatureheader - Signed over: The JSON body exactly as sent
Verifying the signature (Node.js example)
const crypto = require("crypto");

const signature = request.headers["Signature"];
const rawBody = request.body; // Must be the raw body string, not parsed JSON

const computed = crypto
  .createHmac("sha256", secret)
  .update(rawBody, "utf8")
  .digest("hex");

if (computed === signature) {
  // Signature is valid
}
Troubleshooting signature verification
If your signature verification is failing, check the following:
- Use the raw body: The signature is computed over the raw JSON string, not a parsed and re-serialized version. Make sure your framework gives you access to the unmodified request body.
- Check for gateway modifications: Some API gateways (e.g. AWS API Gateway) may re-encode the JSON body or base64-encode it before passing it to your handler. Ensure you're hashing the body exactly as it was received over the wire.
- No trailing whitespace in the secret: When copying the secret from Settings, make sure no trailing spaces or newlines are included.
- No trailing newlines in the body: If testing manually with
openssl dgst, make sure your body file doesn't have a trailing newline. Useecho -norprintfinstead ofecho.
Quick Example:
The following webhook is sent by ProductLift when a new vote has been received.
You can see the vote, the post, and the portal data.
{
  "id": "vg3EGg2wcHgd8nMl",
  "creation_time": "2022-06-01T18:17:37Z",
  "event": "vote.created",
  "data": {
    "vote": {
      "id": 500,
      "created_at": "2022-06-01T18:17:37.808782Z",
      "voter": {
        "id": 48,
        "name": "Rubenb",
        "email": "ruben@abc.nl",
        "role": "admin",
        "counter_votes": 2,
        "counter_comments": 18,
        "counter_posts": 12,
        "counter_comment_votes": 0
      }
    },
    "post": {
      "id": 99,
      "title": "This is a great idea",
      "description": "Wow. This is the best idea I have ever seen!",
      "author": {
        "id": 48,
        "name": "Rubenb",
        "email": "ruben@abc.nl",
        "role": "admin",
        "counter_votes": 2,
        "counter_comments": 18,
        "counter_posts": 12,
        "counter_comment_votes": 0
      }
    },
    "portal": {
      "id": 4,
      "title": "Test Portal"
    }
  }
}