Install Widgets
Table of Contents
With ProductLift widgets, your users no longer need to jump outside of your app. Users can be automatically logged in to ProductLift and don't need to create an account.
You can have multiple widgets on your application or website, for example a Roadmap embed and a Changelog sidebar.
Sidebar widget
Display your changelog, roadmap, or another ProductLift page on your website or app on a sidebar that is opened on demand. You can add a button on your site that opens the sidebar.
Example
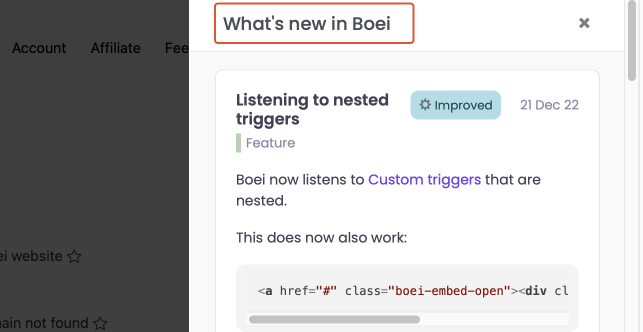
In this example, you see the sidebar opened on the right side of the Boei app.

The example uses a code like this:
<a href="#" data-productlift-sidebar="e6e4ffb3-1aa7-49ac-86d0-xxxxxxxxx">Open Widget</a>
<!-- ProductLift SDK - Include it only once -->
<script defer src="https://your-portal-url.productlift.dev/widgets_sdk"></script>
Setup guide
-
In the menu, click on Settings and then Widgets.
-
Click "Add Widget"
-
Enter a name for your widget. This name is only visible to you.
-
Choose Sidebar
-
Select a page type (e.g., Tab when you want to display the Roadmap, Changelog, or Upvote board)
-
Choose the Tab that you desire
-
Enter a Title, this will be displayed on top of the Sidebar

- Press Create to make this widget
- You now get the installation code to add this widget to your website. Make sure to only include the ProductLift SDK once in your website.
You can fully customize the design of your embed using Custom (S)CSS.
Embed widget
Display your changelog, roadmap, or another ProductLift page on a particular page of your website by simply pasting the widget code into the desired area.
Example
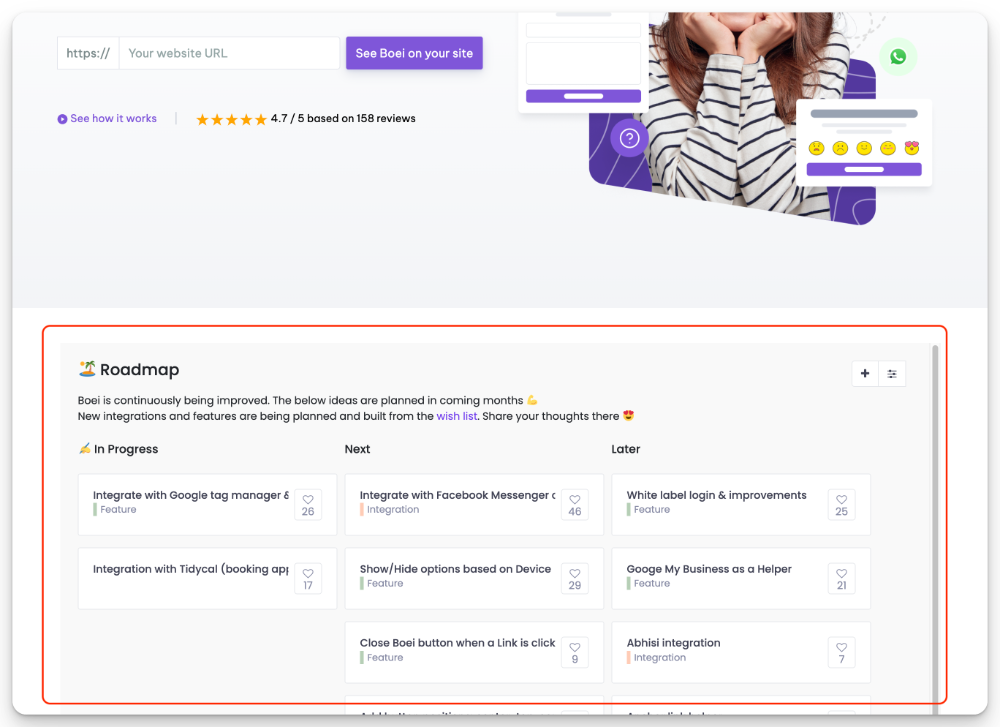
In this quick example, you see the Boei roadmap being embedded in the website.

The example uses a code like this:
<div data-productlift-embed="1e83b3a3-b688-41d7-90c1-xxxxxxxxxxx" style="height: 800px;"></div>
<!-- ProductLift SDK - Include it only once -->
<script defer src="https://your-portal-url.productlift.dev/widgets_sdk"></script>
Setup guide
-
In the menu, click on Settings and then Widgets.
-
Click "Add Widget"
-
Enter a name for your widget. This name is only visible to you.
-
Choose Embed
-
Select a Page type (e.g., Tab when you want to display the Roadmap, Changelog, or Upvote board)
-
Choose the Tab that you desire
-
Select which elements you want to see in your embed
You can enable/disable the menubar and tabs bar

You can enable breadcrumbs for easier guidance without the menu or tabs bar.

- Press Create to make this widget
- You now get the installation code to add this widget to your website. Make sure to only include the ProductLift SDK once in your website.
You can fully customize the design of your embed using Custom (S)CSS.
Single sign-on
Your users no longer need to log in to ProductLift with single sign-on. For this, you need to create an SSO token.
👉 See our single sign-on guide
You can provide a ProductLift single sign-on token to your widgets easily.
Just add ?sso=TOKEN to your SDK url.
<script defer src="https://your-portal-url.productlift.dev/widgets_sdk?sso=xxxxxxxxxxx"></script>
Installation in Vue
Below is an example of how you can add ProductLift widgets in Vue.js.
export default{
        data: () => ({
            productlift_sso_token: null,
        }),
        async created() {
            this.$http.get('/user/' + this.$auth.user().id + '/productlift_token')
                .then(({data}) => {
                    this.productlift_sso_token = data.token // await the SSO token

                    let ProductLiftScript = document.createElement('script')
                    ProductLiftScript.src = 'https://your-portal-url.productlift.dev?sso=' + this.productlift_sso_token
                    ProductLiftScript.defer = true;
                    document.head.appendChild(ProductLiftScript)
                })
                .catch(error => {
                    console.log(error.response)
                })
        },
    }
Installation in React
Below is an example of how you can add ProductLift widgets in React (thanks to Mike!).
function useProductLift() {

    async function init_widgets() {
      return new Promise(async (resolve) => {
        const { data } = await fetch('/productlift/widgets', { method: "POST" });
        let ProductLiftScript = document.createElement('script');
        ProductLiftScript.src = data;
        ProductLiftScript.defer = true;
        document.head.appendChild(ProductLiftScript);
        resolve(true);
      });
    }

    return init_widgets;
  }

  function FeedbackTrigger() {
    const [ready, set_ready] = useState(false);
    const init_widgets = useProductLift();

    function init() {
      init_widgets().then(() => {
        set_ready(true);
      });
    }

    useEffect(() => {
      init();
    }, []);

    if (!ready) return null;

    return (

        Open Widget

    );
}1 year ago
Hi,
I am trying to add Feedback widget in my Angular 16 project. But it's not working. The API gets cancelled.
is there any different way to do this in angular?
Thanks,
Amaan
0 1 year ago Reply